By Category
Blog Categories
Scope Cleaning: Step by Step Guide

Keeping endoscopes disinfected is vital for patient safety and medical device longevity. A clear, consistent workflow stops biofilm buildup, cuts repair bills by having less issues, and lowers infection risk. Below, you'll find a detailed seven-step process and best practices—to make sure your endoscopes always meet the highest standards.
Key Takeaways
- Act Fast: Begin post-procedure cleanup and scope disinfection right away to prevent soils from drying.
- Clean Thoroughly: Manual brushing and flushing remove debris prior to high-level disinfection.
- Standardized Training: Training and competency assessments ensure rigorous hygiene standards.
- Compatible Gear: Brushes, detergents, and automated endoscope reprocessors (AERs) must be compatible with the endoscope model(s) used.
Why Routine Scope Cleaning Is Essential
Post-procedure, any residual fluids and materials left on an endoscope can turn into a breeding ground for bacteria. Infections linked to improper reprocessing have been reported in GI and pulmonary procedures. Following a reliable protocol protects both patients and staff. It also prolongs the life of expensive medical devices—avoiding frequent repairs or premature disposal, which can cost thousands per incident.
Regulatory bodies require strict reprocessing routines. Federal guidelines mandate adherence to FDA-cleared label claims for high-level disinfectants, including contact times and temperatures (CDC). Meeting those requirements starts with a solid, well-documented reprocessing and disinfection process.
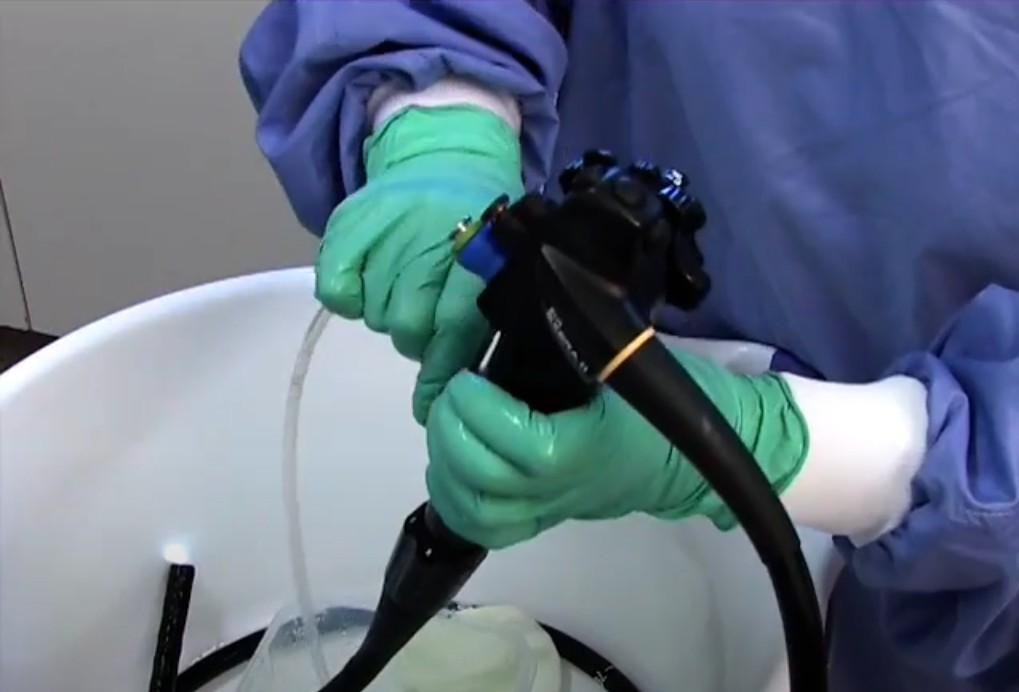
Step 1: Immediate Post-Procedure Scope Care
Immediately after removing the endoscope from the patient:
-
Wipe
the exterior. Wipe the insertion tube with the wet cloth or sponge soaked
in the freshly prepared detergent solution.
- Place the distal end of the endoscope into the appropriate detergent solution and suction a large volume of detergent solution through the endoscope Finish by suctioning air.
- Flush all channels. Flush air and water channels in accordance with the endoscope manufacturer's instructions. Flush the auxiliary water channel per the manufacturer's instructions.
Step 2: Leak Testing
A leak can let disinfectants flood the internal electronics, causing corrosion, image degradation, and stiff articulation. Even worse, hidden moisture creates pockets where bacteria can multiply, risking patient safety and costly repairs Two leak testing methods are common, shown below. But follow the manufacturers' specific guidelines for the medical devices and equipment you own.
- Dry leak test. Connect the endoscope to a pressure gauge and pressurize to the manufacturer's recommended value (often 1.5–2 psi). Hold for 30 seconds and watch for pressure drops.
- Wet leak test. After passing the dry test, submerge the pressurized endoscope in water. Deflect the tip, rotate the biopsy port and channel outlets, and watch for continuous bubble streams. A single burst of bubbles may clear trapped air. But if bubbles persist or pressure dips over 10 mmHg in one minute, treat it as a confirmed leak.
Catching issues now may prevent costly damage while ensuring the patient's safety. And keep in mind, "Tester Maintenance and Calibration" is as vital as the leak testing itself. Wipe down gauges and fittings after each use. Replace O-rings and gaskets as recommended by the manufacturer, and have the unit calibrated annually by the manufacturer or a qualified technician.
Step 3: Manual Endoscope Cleaning
Tools: basin, enzymatic detergent, channel brushes, sponge.
- Fill the basin with warm water and a measured dose of enzymatic detergent approved for your scope model.
- Brush each channel. Select brushes sized for your channels (for example, MedService Repair Channel Brush). Brushing until there is no debris visible on the brush.
- Soak removable parts. Place valves and caps in detergent for 2–3 minutes, then wipe clean.
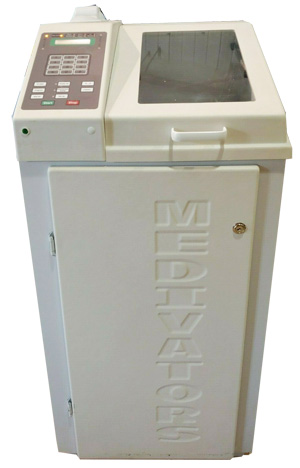
Step 4: Automated Endoscope Reprocessing (AER)
Automated endoscope reprocessors (AERs) bring consistency and safety to high-level disinfection by running programmed cycles that flood channels and surfaces with validated detergents and disinfectants and rinse automatically. Key benefits include:
- Reduced chemical exposure. Technicians avoid direct contact with concentrated chemicals.
- Consistent cycles. Machines fill, disinfect, rinse, flush with alcohol, and air-dry on a programmed timetable.
- Faster turnaround. Many clinics cut reprocessing time by up to 30 percent.
By integrating an AER—properly validated, routinely monitored, and loaded according to manufacturer instructions—you'll optimize your reprocessing workflow, reduce hours worked, and reduce chemical exposure risk, all while meeting stringent regulatory requirements.
AERs are also strongly recommended by the World Gastroenterology Organization for GI endoscope reprocessing PMC.
Step 5: High-Level Disinfection (HLD)
Handle solutions with PPE in a well-ventilated station.
High-level disinfection (HLD) destroys nearly all microorganisms. Under Spaulding's scheme, endoscopes contact mucous membranes and thus need HLD before storage or reuse.

Choosing the Right Chemistry
Select an FDA-approved disinfectant that's compatible with your scope model and validated by the manufacturer's instructions for use (MIFU). Common options include:
- Glutaraldehyde (≥2 percent): 20 minutes at 20 °C per multi-society guidelines SGNACDC.
- Ortho-phthalaldehyde (0.55 percent): 12 minutes at 20 °C CDC.
- Hydrogen peroxide + peracetic acid (7.35 % + 0.23 %): 15 minutes at 20 °C CDC.
Use test strips before each cycle to confirm minimum effective concentrations. Handle solutions with gloves and goggles in a well-ventilated station.
By selecting the correct HLD chemistry, rigorously monitoring concentration, and enforcing strict safety and disposal practices, you ensure scope reprocessing is both effective and compliant.
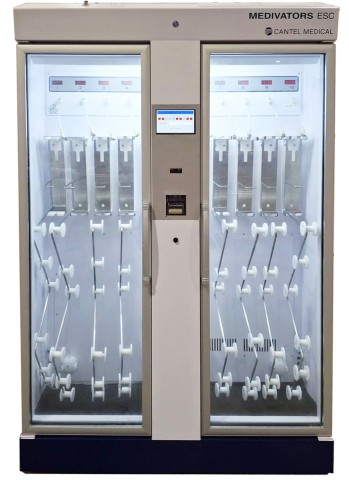
Step 6: Drying and Storage
Moisture left inside channels invites mold. After HLD:
- Air purge channels with filtered, compressed air (at least 10 minutes).
- Alcohol wipe
external
surfaces with 70% to 90% ethyl or isopropyl alcohol.
- Hang vertically in a dedicated cabinet equipped with HEPA-filtered airflow. Tag each endoscopic device with the processing date.
Proper storage keeps endoscopic instruments procedure-ready for days—or even weeks—depending on your facility's policy.
Step 7: Safe Transport
Moving endoscopic instruments between reprocessing and procedure areas requires care:
- Use padded, puncture-resistant cases (for example, Pelican cases with foam inserts).
- Keep endoscopes upright to avoid kinks in channels.
- Label cases clearly with processing date, model name, and manufacturer for replacement parts.
Think of transport like carrying fine glassware. Gentle handling prevents damage.
Training and Documentation
Excellent workflow stems from properly trained employees. Quality training and critical resources build confidence and accountability into your team's routine and sets them up for success.
- New-hire walk-throughs. Show each person how to connect channels, run tests and read cycle reports. Then have them demonstrate those steps back to you.
- Quarterly skills checks. A brief, hands-on quiz every three months keeps techniques fresh and highlights any shortcuts creeping in.
- Record everything. Keep a tidy binder or digital folder where leak-test readings, AER cycle printouts and repair notes live with dates and initials. Inspectors—and your future self—will thank you. Proper storage keeps endoscopic instruments procedure-ready for days—or even weeks—depending on your facility's policy.

Scope Washer Emerging Trends
The next evolutions in scope care promise to speed things up, boost safety margins and shrink your clinic's footprint:
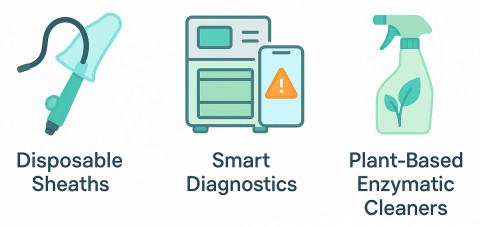
- One-time use sheaths that slip on like gloves, slashing cross-contamination worries.
- Smart AER diagnostics that ping your phone if a cycle drifts off spec.
- Plant-based enzymatic cleaners are replacing harsher solvents and cutting waste.
These tools are just around the corner. Watch for our deep-dive article later this year, where we'll unpack each innovation in detail.
Frequently Asked Questions

Q: Why must I start endoscope cleanup within minutes?
A: Early action stops proteins from sticking and turning into biofilm, which resists all disinfectants.
Q: Can I skip manual cleaning if I use an AER?
A: No. Machines remove less soil if pre-cleaning is skipped. Manual work sets the stage for effective disinfection.
Q: How long can I store a dried scope?
A: Policies vary. Many facilities allow 7–30 days if endoscopes hang in a HEPA-filtered cabinet with date tags.
Q: What if my test strips show low disinfectant concentration?
A: Discard the solution immediately and refill with fresh chemical at the correct concentration.
Q: Are disposable components worth the investment?
A: They cut cleaning process times and eliminate some cleaning process steps, but you'll trade off waste-disposal costs.
Q: What training should staff complete before performing leak tests?
A: Technicians should complete hands-on instruction covering both dry and wet leak-testing procedures, medical device setup, pressure limits and interpretation of results. Competency assessments—ideally quarterly—help ensure everyone follows the same steps and understands how to document findings.
Q: How often should I calibrate or service my AER machine?
A: Follow the manufacturer's maintenance schedule, which typically calls for quarterly preventive service and annual calibration of pumps, sensors and software. Keeping service logs and sticking to that schedule maintains cycle accuracy and regulatory compliance.
Q: What records are required for regulatory inspections?
A: You'll need to check your local and national regulations, but at a minimum, you must document each scope's leak-test results, AER cycle reports (showing temperature, pressure and disinfectant concentration), staff competency checks and microbiological surveillance logs. Organized, date-stamped files with technician initials make audits far less stressful.
Q: How do I choose the right enzymatic detergent?
A: Pick a detergent listed as compatible by both your endoscopic instrument and detergent manufacturers. Look for one that offers broad-spectrum protein removal—ideally with low-foaming and biodegradable ingredients—to balance cleaning performance, safety and environmental impact. We offer a number of enzymatic detergents that are manufacturer compatible with most major brands.
Q: What should I do if a scope fails the wet leak test after passing dry testing?
A: A wet-test failure signals that moisture is entering the scope at low pressures. Immediately remove the scope from service, document the failure (including pressure drop and bubble location), and send it to your certified repair center. Don't proceed with disinfection until the leak is repaired.
By following these steps—fast post-procedure action, careful manual cleaning, reliable leak testing, automated cycles, proper drying, safe transport and diligent training—you'll keep your endoscopes safe, serviceable and ready for the next patient.