By Category
Blog Categories
CER OPTIMA™ Installation Overview
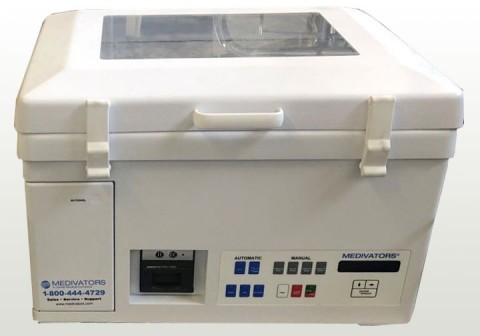
Why Choose the CER OPTIMA™?
The CER-1 and CER-2 OPTIMA™ are well known for their compact footprint and their fast and convenient processing. Made by one of the industry leaders, Medivators® / CANTEL®, this unit with its multiple configurations has become an extremely popular solution for medical practices where space is a challenge but quality is of the upmost importance and cannot be sacrificed.
The CER-1 Optima™ is capable of reprocessing 1 endoscope at a time.
The CER-2 Optima™ is capable of reprocessing up to 2 endoscopes at a time.
Both models are considered to be semi-portable systems that make installation simpler especially if they may need to be mobile or moved at some point in the future. Even if the machines will be permanently positioned, the compact size just makes sense as medical office square footage is not inexpensive.
An added advantage to the CER-1 and CER-2's portability is for services. While malfunctions requiring service are rare on these automatic endoscope reprocessors, if the need did arise at some time in the future, it's possible to have a loaner unit put into place while your unit is being serviced or repaired.
So there's clearly good reasons to consider or choose the CEROPTIMA™ over many other comparable AER machines. So if you've already made the choice, here's a quick overview on some of the steps on how to install it.
Installation Overview
Installation of the CER-1 and CER-2 is relatively easy according to the AER manufacturer and does not require any specialized skills by certified technicians. Below is a broad overview of some of the installation steps routines that you may be performing. But please refer to the manufacturer's full instructions and operator's manual for the specific installation and use steps for the specific unit you have purchased for the most up-to-date and most accurate information.
The main components of the CER OPTIMA™ installation include:
- CER Disinfector Unit
- Disinfectant Reservoir
- Water Filtration System
There's a number of optional items that you may, or may not have purchased with your AER.
- Disinfectant Transfer Pump
- Mobile Transfer Cart
- Vapor Management System
The 3 main components listed above are connected together by connection tubing that comes with your AER unit. They connect to the back of the machine which are clearly labeled "Water inlet", Drain, Air Filter, Chemical Inlet and Chemical Return.
How to setup your CER OPTIMA™ AER Machine
When opening the box, you'll find an installation kit in a bag that is under the lid of the AER machine. You should remove the installation kit and review the components within it.
- Countertop AER Installation
If you're installing the unit on a countertop, the manufacturer indicates that the countertop must be at least 24" width for there to be enough room for the machine to sit on and operate safely. The counter should also be at a comfortable working height as well.
The hoses can be ran over the side of the countertop depending on how you want to install the AER machine and how portable you want to keep it. For a cleaner look and arguably safer as no hoses will be exposed or will be able to be bumped into accidently, you may want to drill holes in the counter instead. Two 2" holes will need to be drilled in the countertop close to the wall, on the left side but behind where the unit will sit so that they are hidden from view from the front. These two hoses will be for the disinfectant reservoir connections hoses and the drain hose. Two additional holes are necessary if your water supply and electricity is also under the counter. These holes should also be drilled close to the wall and to the right of the machine, but behind it (not exceeding the width of the machine) so they are not visible from the front.
Leveling of the unit from side to side and front to back is necessary. The CER OPTIMA™ unit has leveling feet that are able to be screwed in or out to adjust the height at each corner for leveling.
- AER Cart Installation
The optional CER OPTIMA™ cart is the simplest and most portable method. The cart is designed for easy access to the disinfectant reservoir and the water filter system. If you've also purchased the optional vapor management system, you'll want to install the VMS mounting plate onto the cart prior to setting the CER-1 or CER-2 AER system on top of it.
Leveling of the unit from side to side and front to back is necessary. The CER OPTIMA™ unit has leveling feet that are able to be screwed in or out to adjust the height at each corner for leveling.
Once the machine is in place the bar code reader bracket can then be installed on the right side of the unit with the supplied hardware. The barcode readers cable can then be plugged into the socket labeled "Barcode" on the back of the CER OPTIMA™ machine. If you're using the Vapor Management System then the barcode bracket will be installed on the outside of the hood on the right side instead of the right side of the AER unit itself.
A 4' drain hose is provided and can now be connected to the back of the AER unit to the port that says "DRAIN". The drain hose must connect to a drain stand pipe that is at least 1' lower than the bottom of the AER unit itself. A typical dishwasher style drain pipe SHOULD NOT be used as they do not provide adequate drain flow. The drain hose must not have any kinks or bends as it must be free flowing.
If the drain hose provided is too long it can be shortened. To do so, remove one of the end endcaps by unscrewing it. The drain hose has a reverse thread. Once the end cap is removed, cut the drain hose to the desired length and reinstall the cap.
Next, you'll want to install the air filter. The connection tubing is optionally used if the vapor management system is being used. In either case connecting it is very easy as you simply push the white air filter tubing connector which has a 90-degree angle (if using the VMS) or the white straight connector (without the long tubing hose) into the white quick release port labeled "AIR FILTER' on the back of the unit. The blue "Air In" port does not connect to anything as this is where the air enters.
Next, install the role of thermal printer paper supplied with your AER unit. Install the roll with the paper coming off the top of the roll.
Next, open the door that says "Alcohol" by softly pressing inwards and releasing. The door should open and expose the alcohol container. The alcohol is used for end of cycle endoscope channel drying. Unscrew the lid and fill the 500 ml container using only 70% ethyl alcohol or isopropyl alcohol.
Next, make sure that the drain screen cover is positioned over the CER OPTIMA™ basin drain and that no shipping tape is on it prior to use.
Water Filter System Installation
The CER OPTIMA™ AER requires an incoming cold-water supply which must utilize a water shut-off valve for safety. The incoming water supply must be between 40-60 psi and provide a flow rate of 2-3 gallons per minute. The filtration system has two large blue filters that connect to a base at the top. The filtration system can be installed within the optional cart or within existing cabinetry under your counter. It's important to leave enough space below the filters so they can be removed easily as they will need space to move downwards to take them off and replace them.
A stainless-steel hose is provided to connect to the water filtration system. One end connects to the back of the CER OPTIMA™ AER port labeled "Water Inlet" and the other will connect to the ¾ male connection on water filtration system.
The incoming water supply should be connected to the water filtration system using the white colored quick connect fitting supplied. Make sure fittings are snug but do not overtighten. When turning on the water supply keep a close eye on all connections making sure there are no leaks.
Disinfectant Reservoir Installation
No matter what you've chosen to have your automatic endoscope reprocessor sit on, the disinfectant reservoir must be installed below the bottom of the AER basin to prevent the disinfectant to backflow into the basin. Once your reservoir is installed locate the tubes with labels on them indicating "Chemical Inlet" and "Chemical Return. One end of each tube has a 90-degree connector. This end will connect to the back of the AER. Match and insert the 90-degree angled connectors to the identical labels on the back of the AER itself. These are quick connectors that should allow the fittings to slip into and click in place easily. The hoses would then be routed through the holes provided on your AER cart or through the holes you created in your countertop. Then connect the straight end connectors on the other side of these hoses into any of the 3 female quick connect fittings on the disinfectant reservoir itself. The remaining 3rd connector should have a plug inserted into already. Keep that plug in place.
Powering the AER Components
The CER OPTIMA™ CER-1 and CER-2 come with two 8' power cords. One is for the AER unit itself and the other is for the disinfectant reservoir. The power cords can only be plugged into an approved AC GFI (Ground fault interrupter) outlet. Do not use a power outlet that does not have GFI. Plug one of the cords into the power connector on the AER unit and plug the other into the power connector on the reservoir. Then plug both into the approved AC wall outlet.
If using the vapor management system, place the hood onto the VMS base previously installed onto the AER cart. Make certain that no hoses or electrical cords are pinched or bent by repositioning them if necessary.
Performing the Daily Quality Assurance Test
A daily quality assurance procedure must be performed prior to the first use of each day to assure that the Medivators® CER OPTIMA™ reprocessor is functioning properly. This QA test is started upon power up. If the unit is left on 24 hours a day then the test should be ran at any time after midnight.
The QA test can be logged manually using the "Quality Assurance Log CER OPTIMA™" provided by Medivators®. If any of the tests fail, the AER system must be serviced or repaired.
Click here to view the entire Daily Quality Assurance Procedure CER OPTIMA™ set forth by Medivators® and the Quality Assurance Log.
To perform the Quality Assurance test:
- Turn on the water supply
- Power on the CER OPTIMA™ unit
- Connect a male lure lock channel connector to one basin port
- Attach a 90 degree channel connecter to all remaining basin ports
- Shut off full HLD rinse
- Shut off Manual Cycles
- Press "Start"
- Scan the operators ID badge
- Clean the drain screen and make sure it's placed back properly over the drain
- Verify by pressing "Enter"
The front panel touch pad lights should now all be illuminated.
Follow the onscreen instructions.
- 1.Water Flow | Visually make sure that there is proper water flow. If water flow through any of the connectors in the basin is low then measure the volume using the male lure lock channel connector and a graduated cylinder. A minimum of 100ml must flow in less than 15 seconds through each port. Based on the results of this test, press the down arrow button if the system passed or the right arrow button if it failed.
- 2.Basin Filling | Continue following the onscreen instructions while holding the tubing under water making sure that there is bubbling through each connector basin port. Based on the results of this test, press the down arrow button if the system passed or the right arrow button if it failed.
At the completion of this cycle the display will show "Quality Assurance Cycle Completed". The printer will automatically print the cycle report.
Filling the Disinfectant Reservoir
It's vital that whoever is filling or emptying high-level disinfectant is wearing appropriate PPE (personal protective equipment) including masks gowns, gloves, eye protection and or a face shield.
The high-level disinfectant that is used must meet or exceed the quality of the manufacturer's recommendations. Rapicide™ is the Medivators® recommended brand but MedService Repair offers high-level disinfectants that meet or exceed the manufacturer's recommendations and may cost a great deal less especially when considering these are consumables that will be on ongoing expense. Regardless of your choice always refer to the high-level disinfectants manufacturer label and the AER manufacturer's recommendations and instructions for proper use.
Once the basin is filled to the appropriate level turn the disinfectant heater on. The reservoir light will turn on and display in red. The built-in heater can be adjusted to the correct temperature for the high-level disinfectant you have chosen. It can take up to two hours for the disinfectant to reach the correct temperature and the manufacturer indicates that a temperature of 39 degrees Celsius is necessary (4 degrees Celsius above recommended temperature) as there will be chemical cooling in the lines as the disinfectant moves from the reservoir into the basin. This should be considered when choosing the correct temperature setting for the disinfectant you have chosen to use.
It's important to verify the temperature is correct by looking at the thermometer on the top of the reservoir. The digital reading may not accurately display the actual temperature of the disinfectant.
There's a number of operator specific manual cycles that can be performed. The buttons under the "Manual" label on the AER are used to execute these cycles as needed.
- Basin to Reservoir Cycle | Transfers new HLD disinfectant into the reservoir
- HLD to Drain Cycle | Discards used HLD disinfectant to the drain
- Reservoir to Basin Cycle | Transfers HLD disinfectant into the basin
- Basin to Drain Cycle | Discards basin fluids to the drain
Using each of the cycles above are similar in steps so we'll go over just the "Basin to Reservoir" cycle here. Pressing the "Basin to RSVR" button will illuminate a green LED on the button.
Then press the "Start/Stop" button to begin the cycle. The display will indicate its status. At completion press "Start/Stop" to end the cycle and the printer will print a completed cycle report if auto-print is enabled. Alternatively, you can press "Print" to manually generate the report.
Replacing the Water Filters
There are differences in water quality in different areas and there can be seasonal or other differences based on many other variable factors. The filtration system utilizes a step-down filtering system starting with a 1 micron filter and then going through a 0.2 micron bio retentive filter. These filter cartridges must be replaced every 3-6 months. But the water quality and water volume may affect the water filter cartridges life expectancy as well.
If your machine has longer rinse times than expected or rinse alarms it may be time to replace these filters as the filters in place may be too saturated.
The gauges above each filter may indicate which filter, or filters need to be replaced. The largest pressure drop typically indicates the filter that should be replaced but it typically makes sense to replace both filters at the same time.
The filtration system needs to be sanitized. Follow the recommendations of the Medivators® user manual, hospital infection control policies and national and local guidelines on sanitization.